How to Change DNS
Follow the below step by step guide to change your DNS.
Windows XP
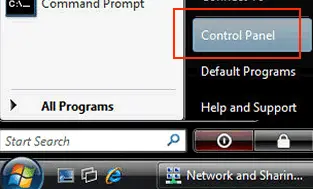
1. Right-click the My Network Places icon on the desktop and click Properties.
OR
Click Start, click Control Panel, and then click once on Network and Internet Connections. Click once on Network Connections.
OR
Click Start, click Control Panel, and then Double-click on Network Connections.
Note: We recommend that you view this folder by Details, instead of by Icons or by List. This allows you to identify the correct connection.
2. From the View menu choose Details.
3. Scroll to the LAN or High-Speed Internet section. You should see listings similar to the below graphic. Please note: your listings may be numbered differently. Select the adapter that the player is using (probably wireless for laptops, Local Area Connection for desktops).

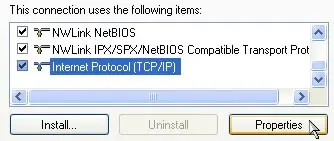
4. Right-click the Local Area Connection icon and then click Properties. Scroll to the bottom of the "This connection uses the following items:" and highlight (select) Internet Protocol (TCP/IP). Then click Properties.
5. Select Use the following DNS Server Addresses and enter:
- Preferred DNS server: 8.8.8.8
- Alternate DNS server: 8.8.4.4
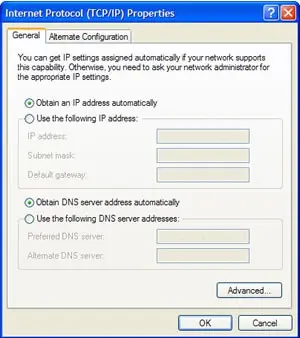
6. Click on OK.
Windows Vista
1. Go to the Start Menu and click Control Panel
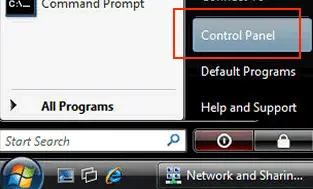
2. In the Control Panel, under Network and Internet, click View network status and tasks.
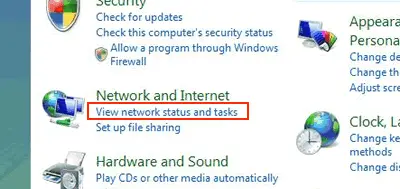
3. Click the link next to Connections on the right. In this screenshot we're using a wired connection so the link is called Local Area Connection. If you're using Wireless the link will be named differently.
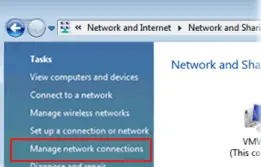
4. You'll see a connection status window, click Properties.
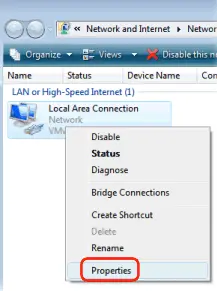
5. Select the Internet Protocol Version 4 (TCP/IPv4) item, and click the Properties button.
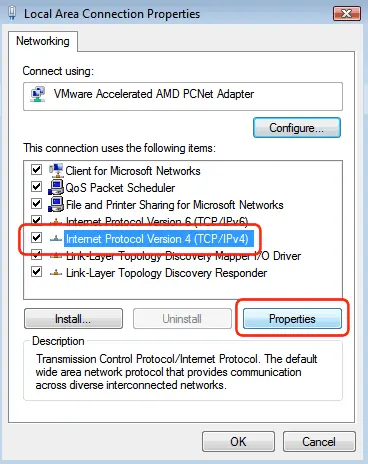
6. Select Use the following DNS server addresses, and enter:
- Preferred DNS server: 8.8.8.8
- Alternate DNS server: 8.8.4.4
7. Finally, click the OK in this and the previous windows to save your changes.
Windows 7
1. Go to the Start Menu and click Control Panel.
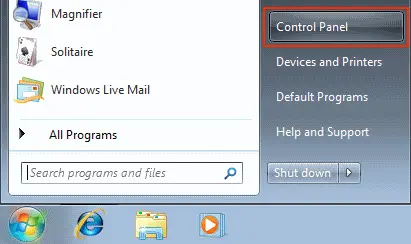
2. In the Windows Control Panel, under Network and Internet, click View network status and tasks.
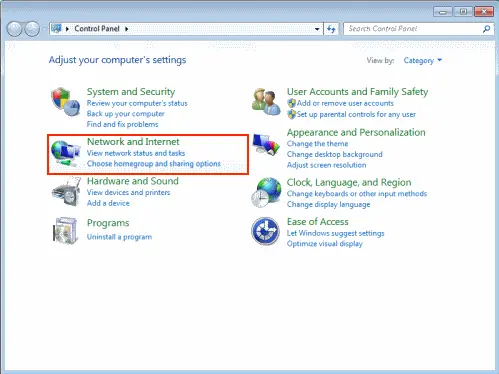
3. Click the link next to Connections on the right. In this screenshot we're using a wired connection so, the link is called Local Area Connection. If you're using Wireless the link will be named differently.
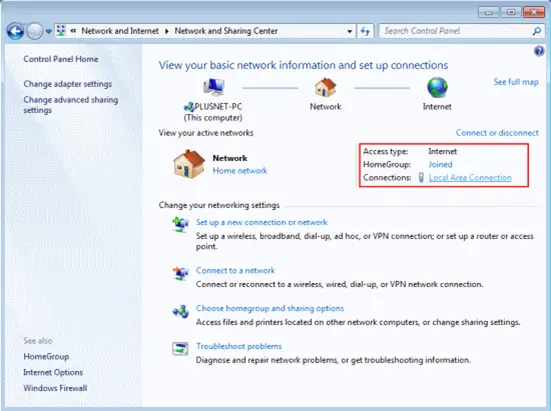
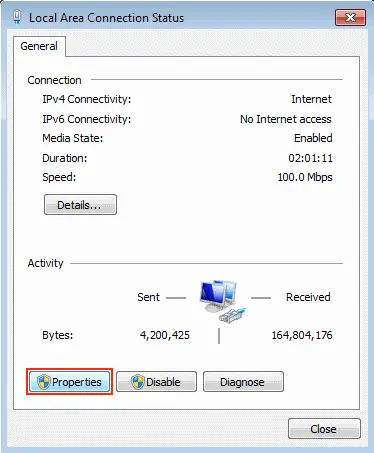
4. You'll see a connection status window, click Properties.
5. Select the Internet Protocol Version 4 (TCP/IPv4) item, and click the Properties button.
6. Select Use the following DNS server addresses, and enter:
- Preferred DNS server: 8.8.8.8
- Alternate DNS server: 8.8.4.4
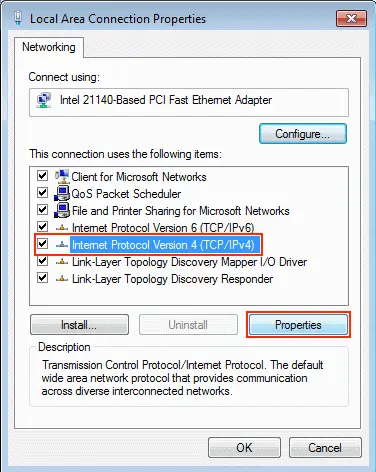
7. Finally, click the OK in this and the previous windows to save your changes.
Windows 8
1. Open the Control Panel. You can either:
- On the Start screen, type Control Panel and click on the Control Panel link in the search results
- In desktop mode, open the Charms menu, choose settings and then select Control Panel
2. From the Control Panel, under Network and Internet, click View network status and tasks.
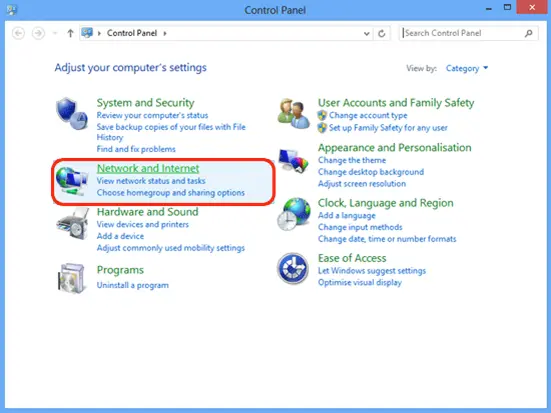
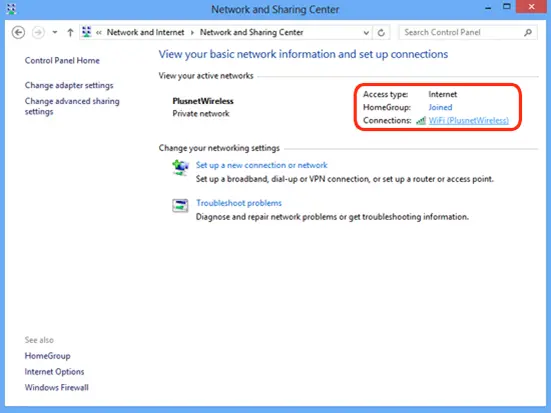
3. Click the link next to Connections on the right.
This screenshot shows a wireless connection to a Plusnet router so the link is Wifi (PlusnetWireless). If you're using a wired connection the link will be named differently. Whatever the case, just click that link.
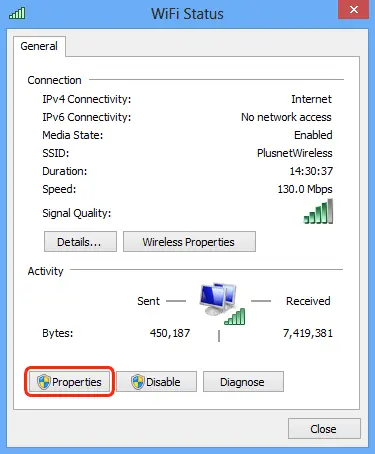
4. On the connection status window, click Properties.
5. Select Internet Protocol Version 4 (TCP/IPv4) from the list, then click Properties.
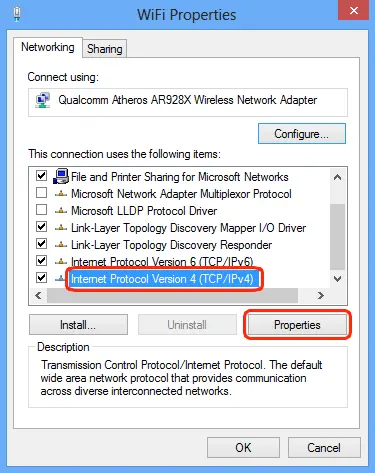
6. Select Use the following DNS server addresses, and enter:
- Preferred DNS server: 8.8.8.8
- Alternate DNS server: 8.8.4.4
7. Finally, click OK on this and the previous windows to save your changes.
Mac OS X
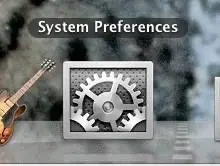
1. Open System Preferences (either by clicking the icon on the dock or by clicking the Apple Icon and selecting it from the list).
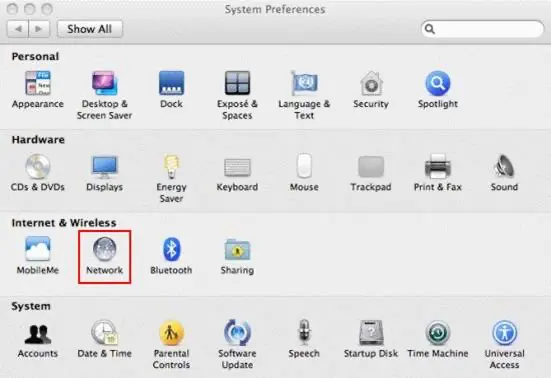
2. Double-click the Network icon.
3. Double-click the connection you want to change DNS for. The connection you're using now will have a green light next to it. In this example we'll be changing the DNS on the AirPort connection.
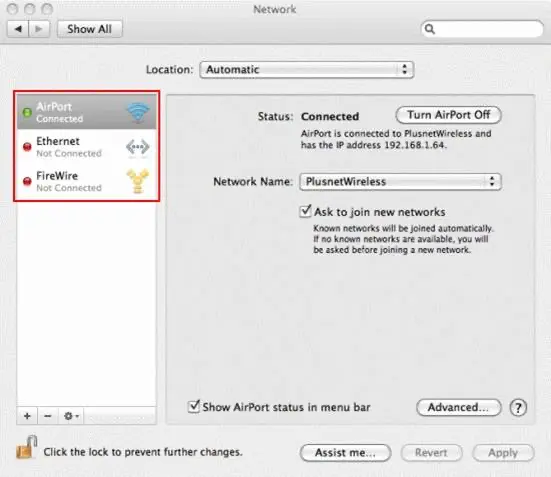
4. On the connection properties window, click the DNS tab.
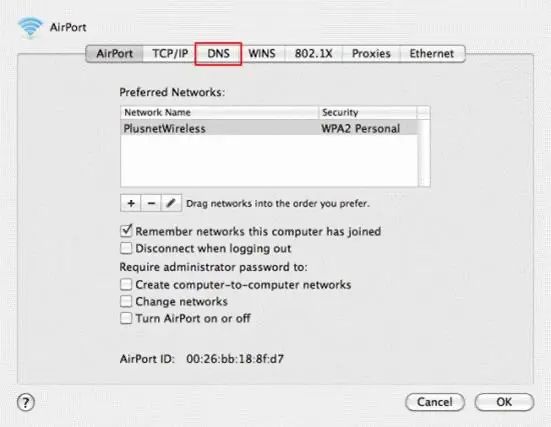
Use the + or - symbols to add or remove the DNS servers your connection uses. Servers will be used in the order they are shown in this list.
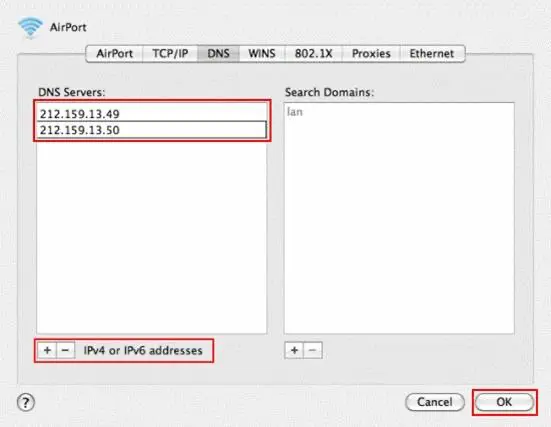
We recommend using the following server addresses:
- 8.8.8.8
- 8.8.4.4
When you've finished, click OK.
5. Now you'll be back at the Connection properties screen. Click OK to finish.
Related Topics:
Did you find what you were looking for?